

The Publishing Process for Creatives: What I Wish I Knew Before I Started
If you're an artist, illustrator or designer hoping to write your first published book, I wrote this guide for you.

Someone recently reached out asking about my experience writing a book with a publisher. Honestly, I jumped right into oversharing mode and basically wrote a novella in response (I think she appreciated it?) I guess this is the guide I wish I had before I started. And just in case anybody else asks, I’m sharing it here, for anyone else who’s curious about what it actually looks like to publish a book.
This is, of course, based on my own experience. Details will vary from author to author and between publishers.
1. Start with a Solid Pitch
Whether you approach a publisher or they come to you, you need a thought-through idea before anything moves forward. They’ll want to know: What is this book about? Why are you the right person to write it? Who is the audience — and do you already have some of that audience?
They’ll also want a rough chapter list. This is early days, and they’ll likely work with you to refine it later — but you need something to show them at least at a high level what topics you’ll cover around your subject.
Also, you should have a vision for how the book will look and feel, not just what it will be about. That means thinking at least at the notional level about details like the size and shape of book, the paper stock, what it might look like on the shelf, and such.
Tip — Don’t be surprised if they want to see your social media numbers. That’s what they’re counting on.
2. The Offer
If they bite, you get an offer letter and work out the terms. I’m not going to get into the details of that part — that’s a conversation for a lawyer or agent — but let’s assume you accept their final terms and you’re a signed author. Congratulations! Now the real work begins (and just a spoiler alert: it never really ends).
Good to Know — Your publisher agreement will include a page count, and approximate formatting specs in terms of size and binding type.
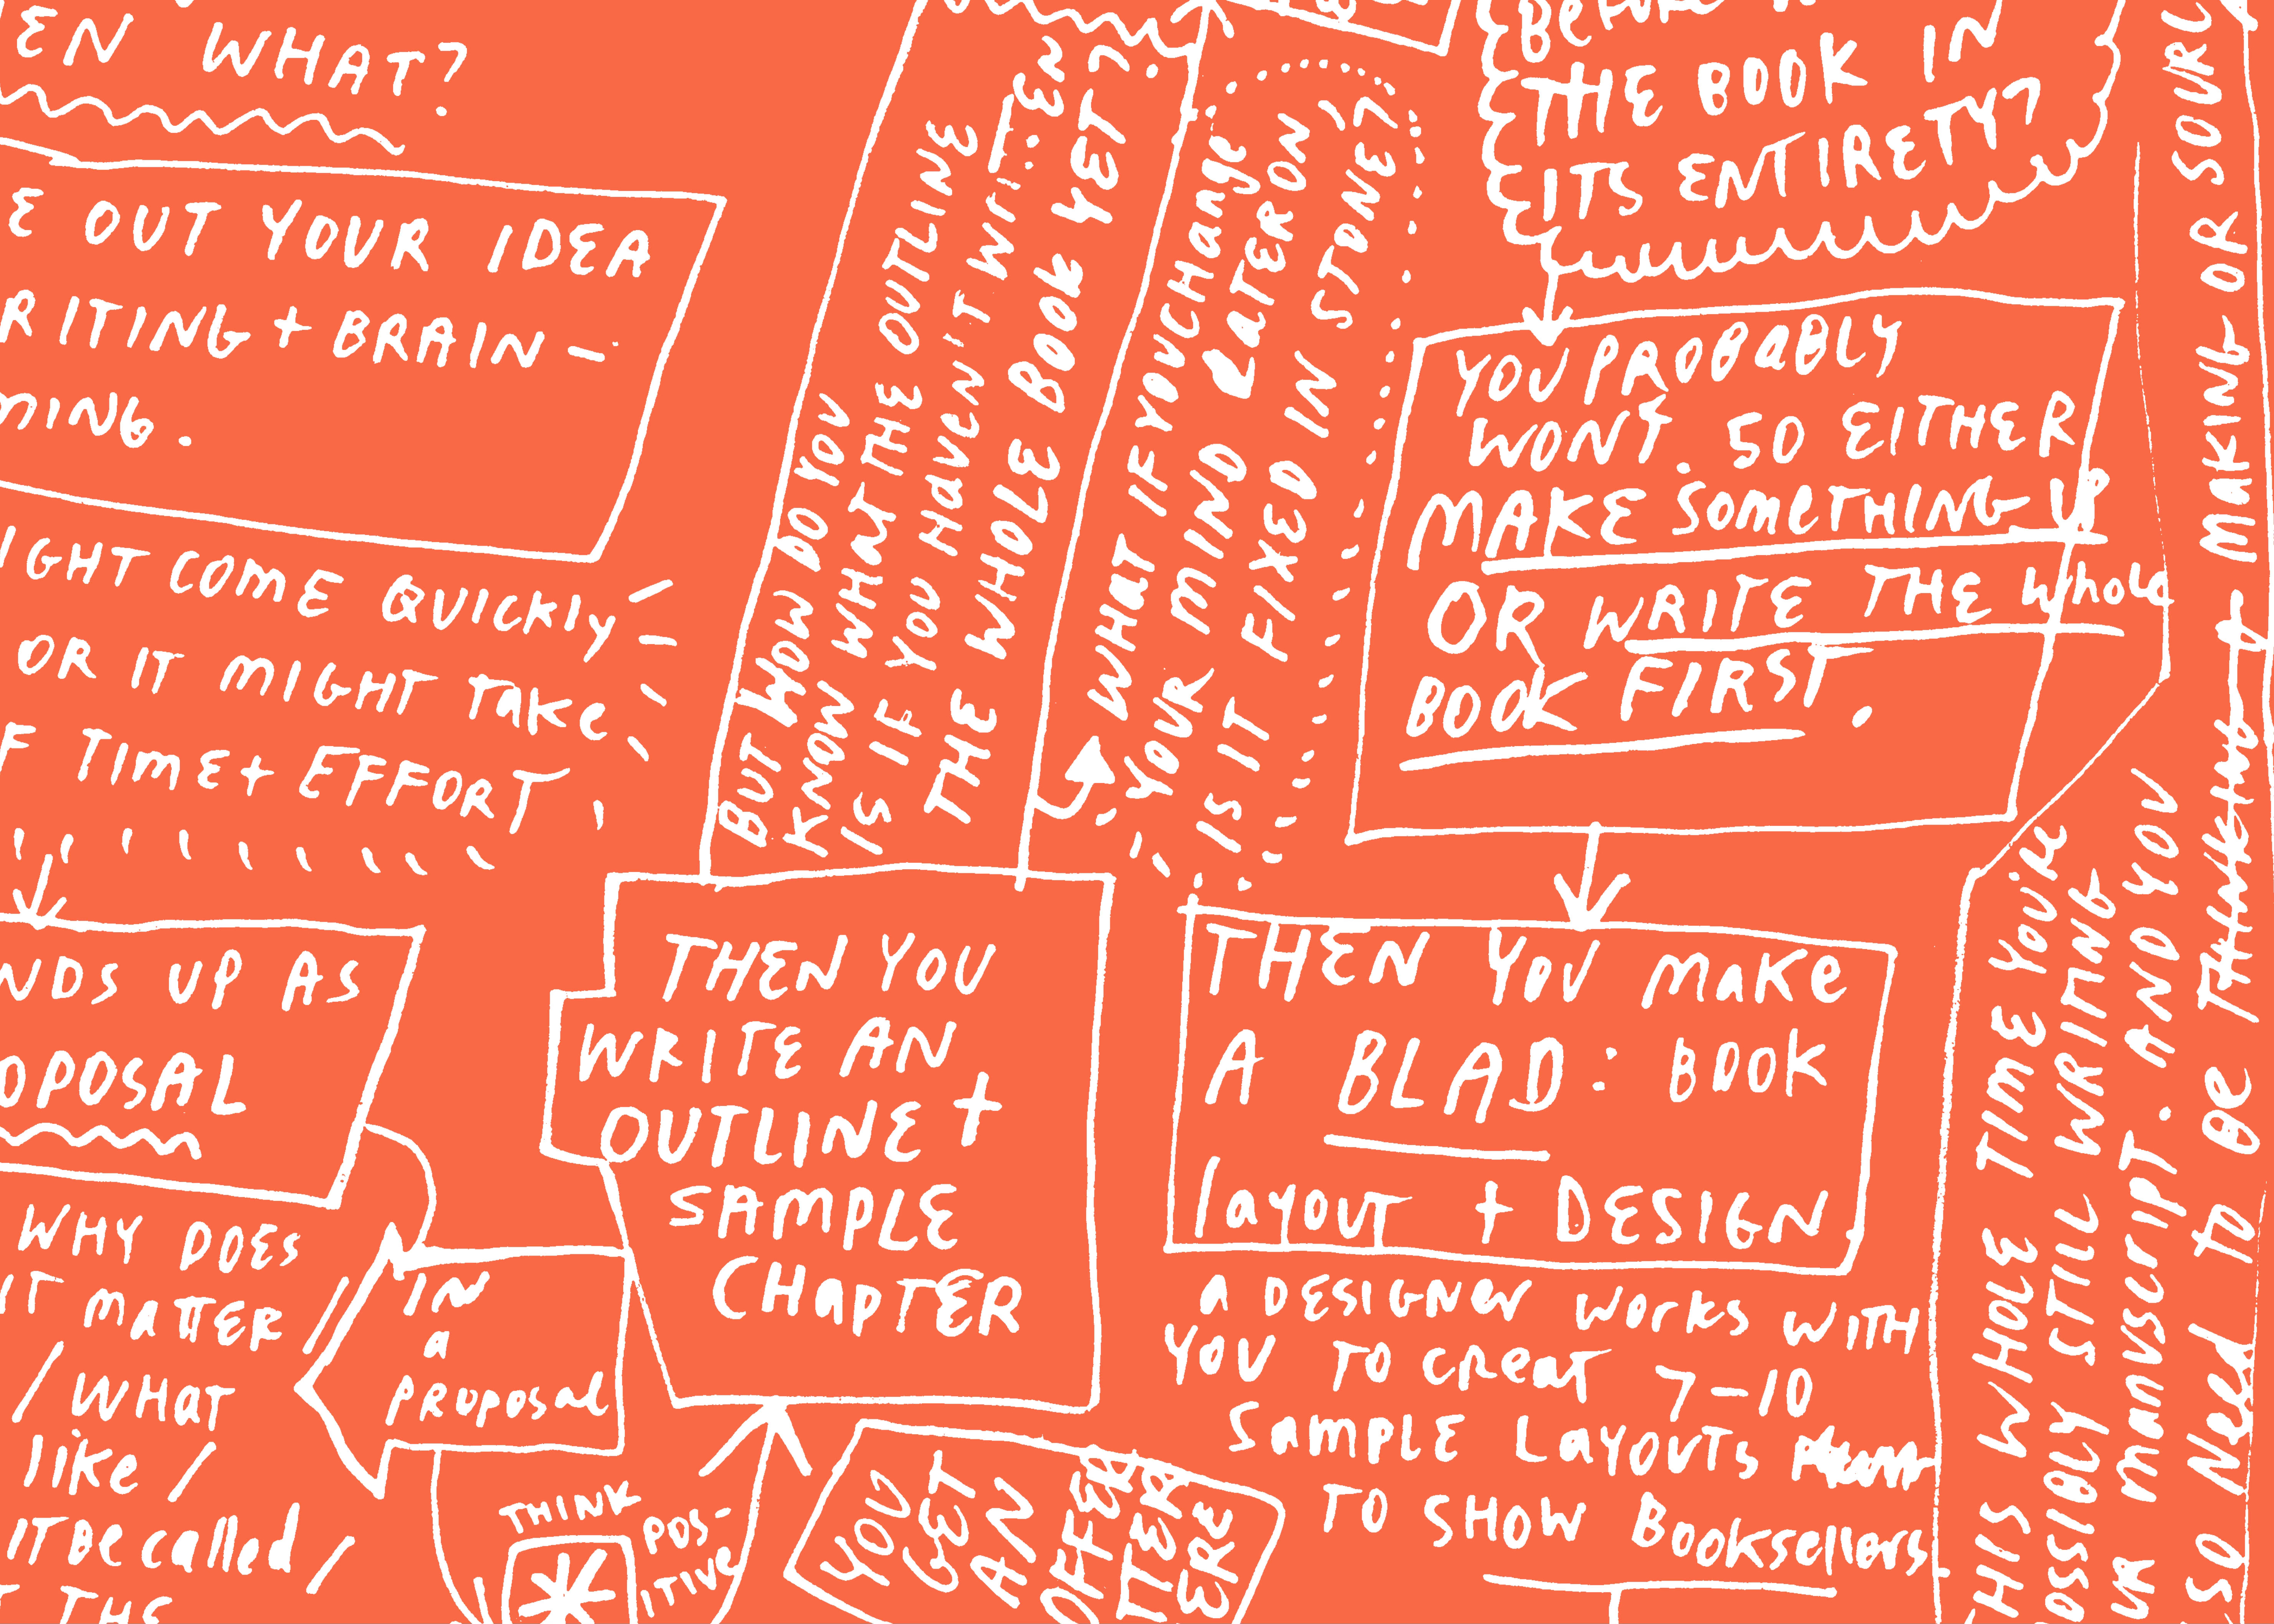
3. Outline and Sample Chapter
This was one of the hardest parts for me. To write what I thought was an outline I could stick to, I basically had to write the whole book up front. If you’re better at thinking ahead than I am, this step will be easier. Either way, just do your best to have an outline that covers what you need to say in the book and commit to it. Know that an initial outline is not totally set in stone — ideas naturally shift and evolve as you go. That being said, the more you can lock in early, the better.
4. The Book Map (Pagination Plan)
This is a page-by-page plan of your entire book: where the text goes, where the images go, and approximate word counts. How will your chapters be structured? How much real estate will you give each section? Will there be an index? This was a bit of a chicken-and-egg thing for me — how could I know how pages would flow until I had the manuscript down? But how could I know how many words to include in the manuscript until I knew how the pagination was going to work? My advice: get your manuscript draft as completely as possible before you get to this stage. Then use the pagination plan to determine how much to include or cut in your final draft.
Tip — If you’re a designer, use InDesign or a similar program to create a rough version of your full book. Flow your draft into it along with image placeholders. This is a very hands-on way to work out your word count and image placements.
5. Know Your Black Ink Constraint
As a designer, this one should not have surprised me as much as it did: all copy (text) in the book must be printed in black ink only, and kept separate from images (unless black ink will read clearly over part of an image). Why? When the book goes into foreign-language editions, publishers only swap out the black plate — so the text can be translated without reprinting the entire book in full colour. It’s a production and cost decision, but it has real design implications. Thos fancy reverse type-over-image spreads you were dreaming of? Unless you’re working with a boutique publisher, you’ll probably have to let this idea go.
6. The BLAD
Before you get too deep into production, the publisher will want a BLAD — a Book Layout and Design document. You work with a designer (usually assigned to you by the publisher) to create a handful of sample spreads to show booksellers what the book will look like. It’s preliminary, but in my experience, the structure and design language established here stays pretty consistent through to the final book. Specific content will change; the overall Book Layout and Design probably won’t.
Tip — The further you go in the process, the more committed your decisions become.
7. Writing, Art-Making, and the Art Log
While all of this is happening, you’re still writing, and sourcing artwork/images that will go in the book. This includes sourcing images from contributors, sourcing scans and photos of your own work, and producing original art if that’s part of your plan. This is where I really struggled, given that I was doing all of the above! The publisher may ask you to maintain an “Art Log” — a spreadsheet listing every image, its filename, and which page it’s slotted for. This matters a lot for the book’s designer, who you may not be working with directly. My publisher was large, and so had a very rigid process for this. Even if you have a good relationship with your designer, the habit of documenting your assets carefully will save you headaches later.
Good to Know — Fortunately for me, I hand-picked my designer (which the publisher agreed to hire), and was able to work directly with him on the design and layout of the book, so I was able to side-step my publisher’s strict art logging process.
8. Cover Design
Somewhere in the middle-to-late stage, the book cover gets designed. I designed my own. Because of how the publishing process is structured, I was paid separately to design the cover — which means the publisher set up a separate contract for this part of the project. If you’re not doing it yourself, be prepared to collaborate with the publisher and their own designer on the creative direction. Either way, expect to go back and forth on the title and back-cover copy with their team. In my experience, they had a copywriter work with me on the back cover blurb.
Tip — If you’re hoping to design your own cover, be prepared to work with their templates and branding guidelines. You need to know your way around the design for print process to handle this without a steep learning curve.
Good to Know — The design of the cover in my case did not include a separate illustration budget. The entirety of the cover, including lettering, illustrations, and the actual design part, were all covered in the agreement, which may or may not have been work for hire.
9. Final Manuscript and Editing
The final manuscript stage caught me off guard. I expected more heavy-handed editorializing of my draft — someone who’d help improve the writing, make it more consistent, help carry my voice but with more of a professional touch. Instead, they seemed to focus mostly on the minutiae of their house style: which type of dash they prefer, how much space to either side, whether or not to use the Oxford comma, and such. They left my actual writing more or less alone. Maybe I should have taken that as a compliment?
Why this Matters — when my designer started flowing the copy into layouts, I was over word count (by a LOT) on many pages. I was also still deep in producing artwork and chasing down contributors. At this point it was really crunch time for me, and so I used an LLM to help trim back my writing to fit word counts (remember, I mistakenly assumed I was going to get a human to help me with this). While others might never notice it, for me this sticks out as something I’m not proud of.
The Lesson — Even though I wrote the original text and AI just helped me cut back the word counts, I still feel like I missed out on the creative opportunity to do it myself. I actually don’t mind dong this for more ephemeral text, but a book is permanent. Make sure you have enough time to do your own writing (and self-editing where necessary) at each stage. Ask the publisher about how much editorial assistance they will be giving you in your actual word-smithing. Trust in your own voice. Don’t let AI have the final say on the words you immortalize in print.
10. Marketing and the Pre-Order Campaign
Once the manuscript is with the designer and ultimately off to the printer, take a moment to breathe! Celebrate with your friends over a nice dinner! And then prepare to be handed off to the marketing team. This is where many authors (myself included) are caught off guard: the publisher handles distribution, not pushing your work to new audiences. They get your book into bookshops, galleries, and online retailers. They manage a lot of the logistics that you’re probably ill-equipped to handle. But driving awareness, building excitement, and pushing pre-orders is going to be on you.
Good to Know — Pre-orders matter more than you might think. A strong pre-order campaign predicts a strong post-launch run. Start thinking about this early: what can you offer people who order before the book comes out? Signed bookplates, a poster, early access to something — whatever fits is most relevant to your book and the audience you hope to reach.
11. Book Launch Events
Launch events are meaningful, but of course, they’re not going to be what sells your book in large quantities. A reading and signing for 30 people at a bookshop is a lovely thing — and a good photo op — but it won’t by itself make you a bestselling author. Think of them as a way to feel more connected to your audience, and perhaps to acknowledge the fans in your own backyard.
Tip — An online launch can work as part of your strategy, especially if your audience is spread out. I did my official launch day online as a Drawing meetup — totally relevant to the theme of my book.
Bonus Tip — Think beyond the book shop launchy. I’m seeing my book as a catalyst for more in-person events like workshops and speaking engagements. I’ve already done one speaking engagement and will be doing a workshop based on the book at a major creative industry conference.
A Few Key Takeaways
Do as much up front thinking about your book as you can. The clearer your vision going in, the less painful every subsequent stage will be.
Your main contact may be more coach than critic. My acquiring editor helped me set deadlines, checked in regularly, and kept me accountable — that was invaluable, even if the line editing was lighter than I expected.
The publisher gets your book in shops. You do the marketing. Be ready to be your own hyper-upper.
The publisher is not your fairy godmother. They’re not going to magically transform your writing into bestselling author material. Assume you will be 100% responsible for the quality of your content in the end.
The process is long, sometimes counterintuitive, and occasionally a head-scratcher. But if you go in with eyes open, and with a little luck, you’ll navigate it a lot more smoothly than I did my first time!
Good luck out there!
—Tom
Yes — I Actually Wrote a Book
If you appreciated this post, please let me know — and if you happen to love drawing, consider buying a copy of Drawing is Important: How to Start a Lifelong Daily Drawing Practice — the exact book I’m talking about here!

As someone somewhere in the first stages of this process this was super interesting. Thank you. And congrats on the book!
I had your book on my wish list since it came out and got it for myself as an Eid gift. Love it so far and love you sharing the process so generously!